Method 1: Turn Off Copilot in Windows 11 via Group Policy
- Open the Local Group Policy Editor and browse to:
User Configuration -> Administrative Templates -> Windows Components -> Windows Copilot. On the right-side pane, double-click the “Turn off Windows Copilot” policy.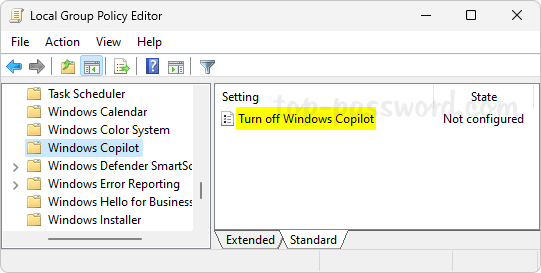
- Select the Enabled option. Click Apply and OK.
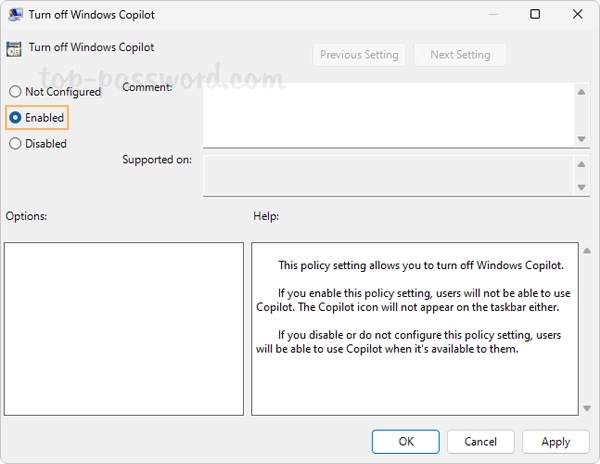
- Close the Local Group Policy Editor. The Copilot button should have been immediately removed from Windows taskbar, and you’re unable to see the Copilot option any longer via the Taskbar settings page.
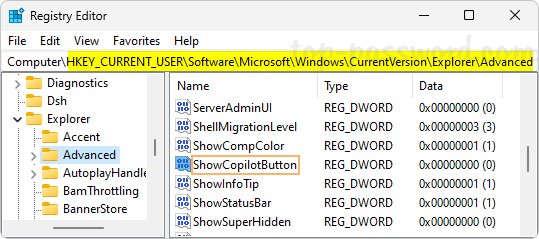
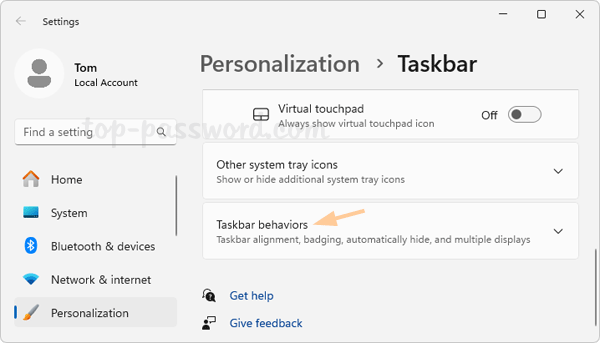
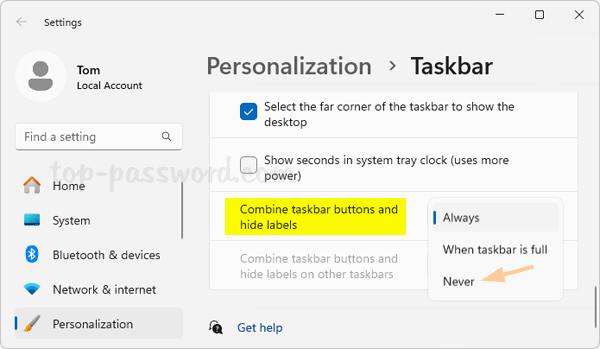
Method 2: Turn Off Copilot in Windows 11 via Registry Editor
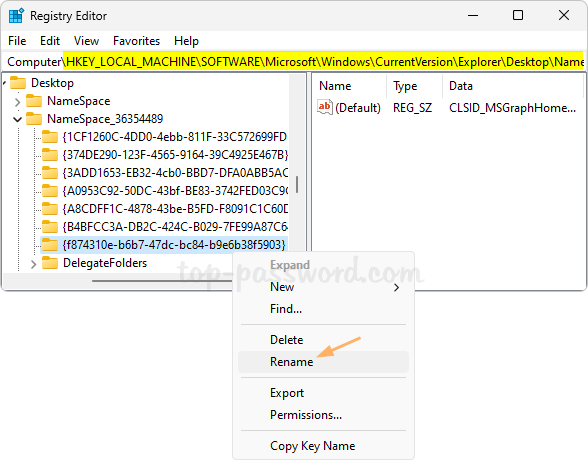
- Open Registry Editor. Use the left pane to navigate to:
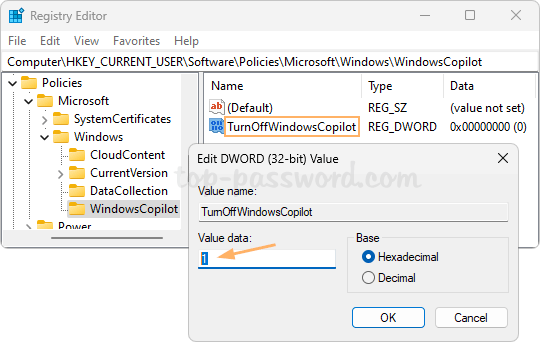
HKEY_CURRENT_USER\Software\Policies\Microsoft\Windows. Right-click the Windows key and choose New -> Key.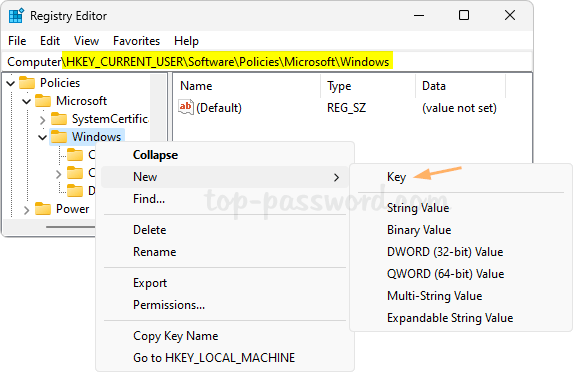
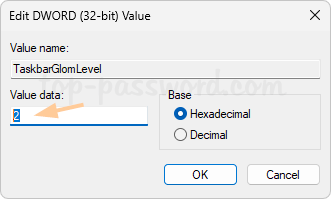
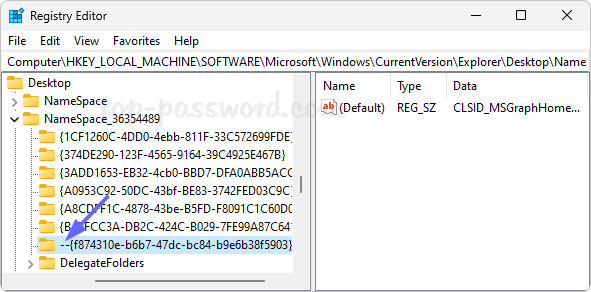
- Name the new key “WindowsCopilot” and highlight it, then right-click the blank area in the right pane and choose New -> DWORD (32-bit) Value.
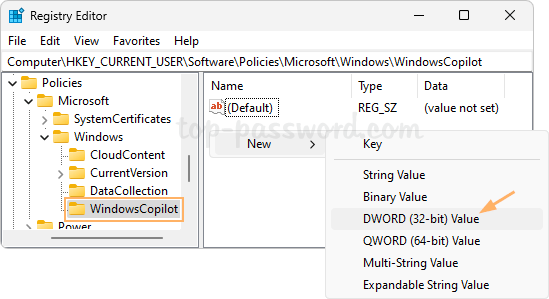
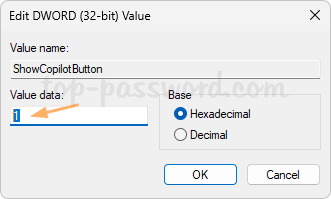
- Name the new DWORD “TurnOffWindowsCopilot” and set its value data to 1. Click OK.
- Close Registry Editor. Microsoft Copilot will be removed from the taskbar, and the Copilot option will no longer be available in the Settings app as well. If you want to enable Windows Copilot again in future, just change the value data of TurnOffWindowsCopilot to 0.
That’s it!
]]>